
Flushing a tankless water heater is crucial to keeping it in excellent condition so your home can access continuous hot water with little to no issues. You may have heard that you need isolation valves to flush a tankless water heater, but is that true, and can you do it without it?
At Monkey Wrench Plumbing, Heating & Air, we have flushed thousands of tankless water heaters in homes across Los Angeles and the neighboring communities. For over 15 years, we have helped homeowners with everything involving tankless water heaters, from new installations to flushing and maintenance.
It is possible to flush a tankless water heater without isolation valves, but it depends on the water line connections. If the hot and cold water lines connecting to the tankless water heater are flexible, it can be flushed. On the other hand, if the lines connecting to the tankless water heater are pipe only, then isolation valves are required.
In this article, we’ll review the steps required to flush a tankless water heater without isolation valves. Now, before we get started, we’ll go over the necessary tools needed to flush a tankless water heater without isolation valves.
What Tools Do I Need to Flush a Tankless Water Heater Without Isolation Valves?
Before you can even start flushing out your tankless water heater, you will need to make sure you have the tools ready for the job. Here’s a list of the necessary tools for flushing a tankless water heater without isolation valves.
- Channellock pliers: These handy pliers are excellent for loosening and retightening the hot and cold water connecting lines with the tankless water heater.
- Rubber gloves (optional): Although not completely necessary, rubber gloves help keep hands clean from any dirt and protect them from the vinegar scent and hot water.
- One gallon of white vinegar: Kitchen-grade white vinegar is a great choice for a descaling solution because it helps remove sediment buildup. An alternative option is commercial descalers used explicitly for tankless water heater flushes.
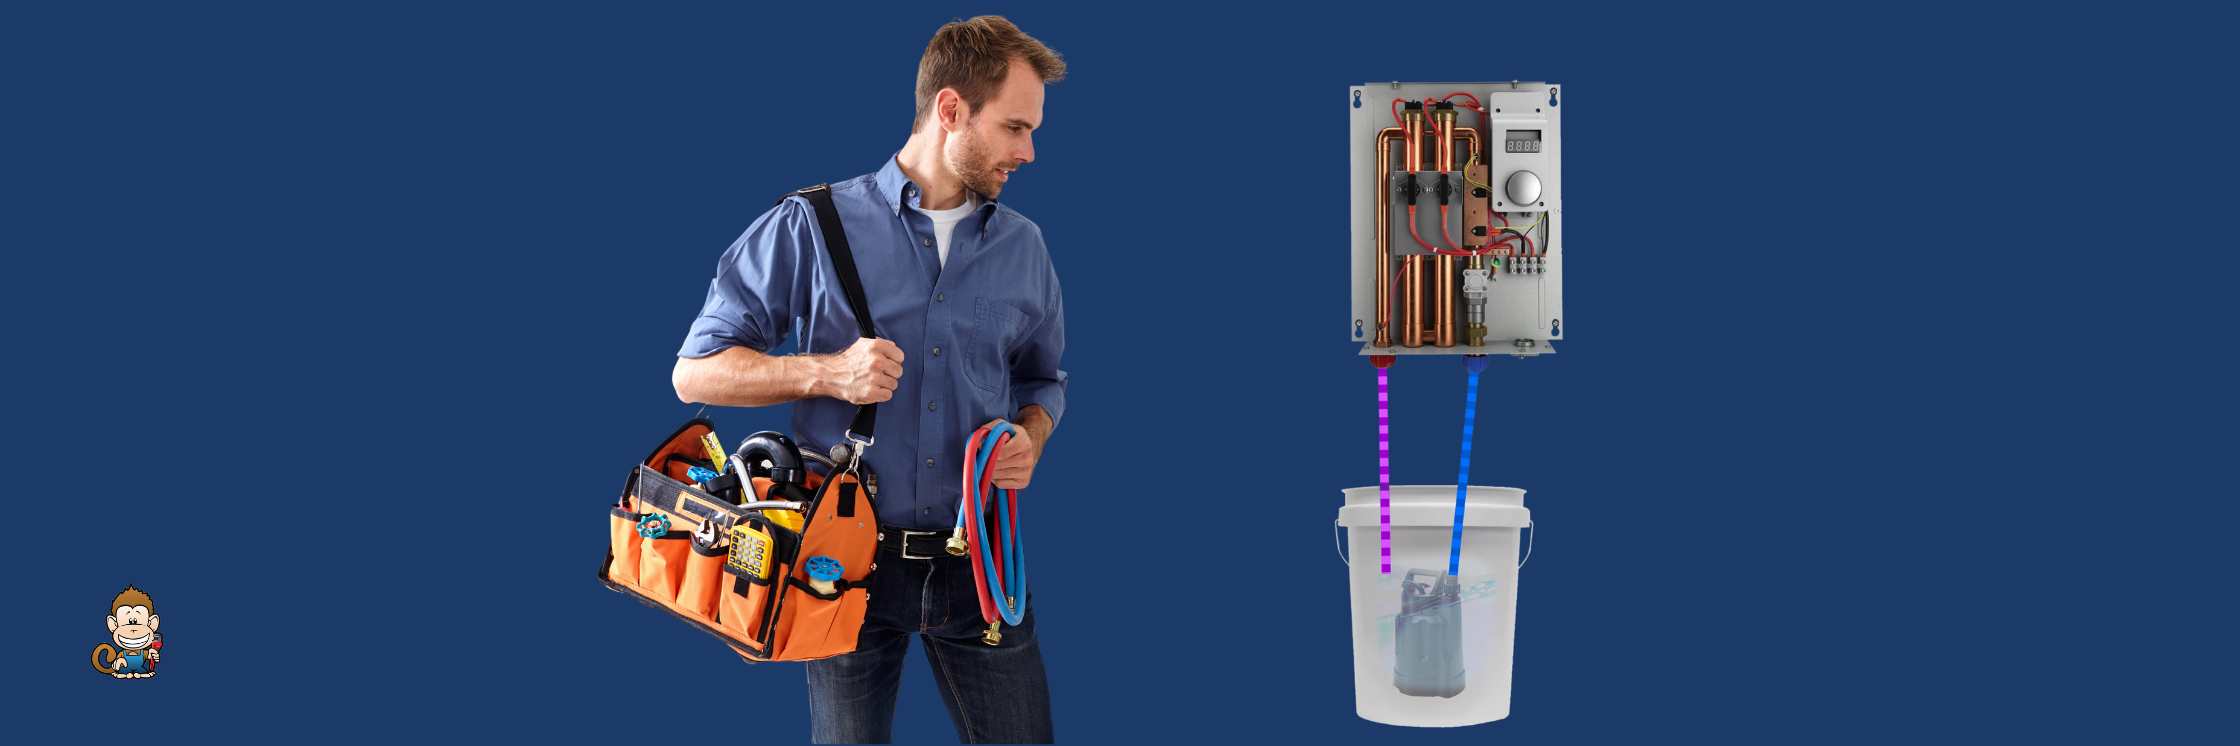
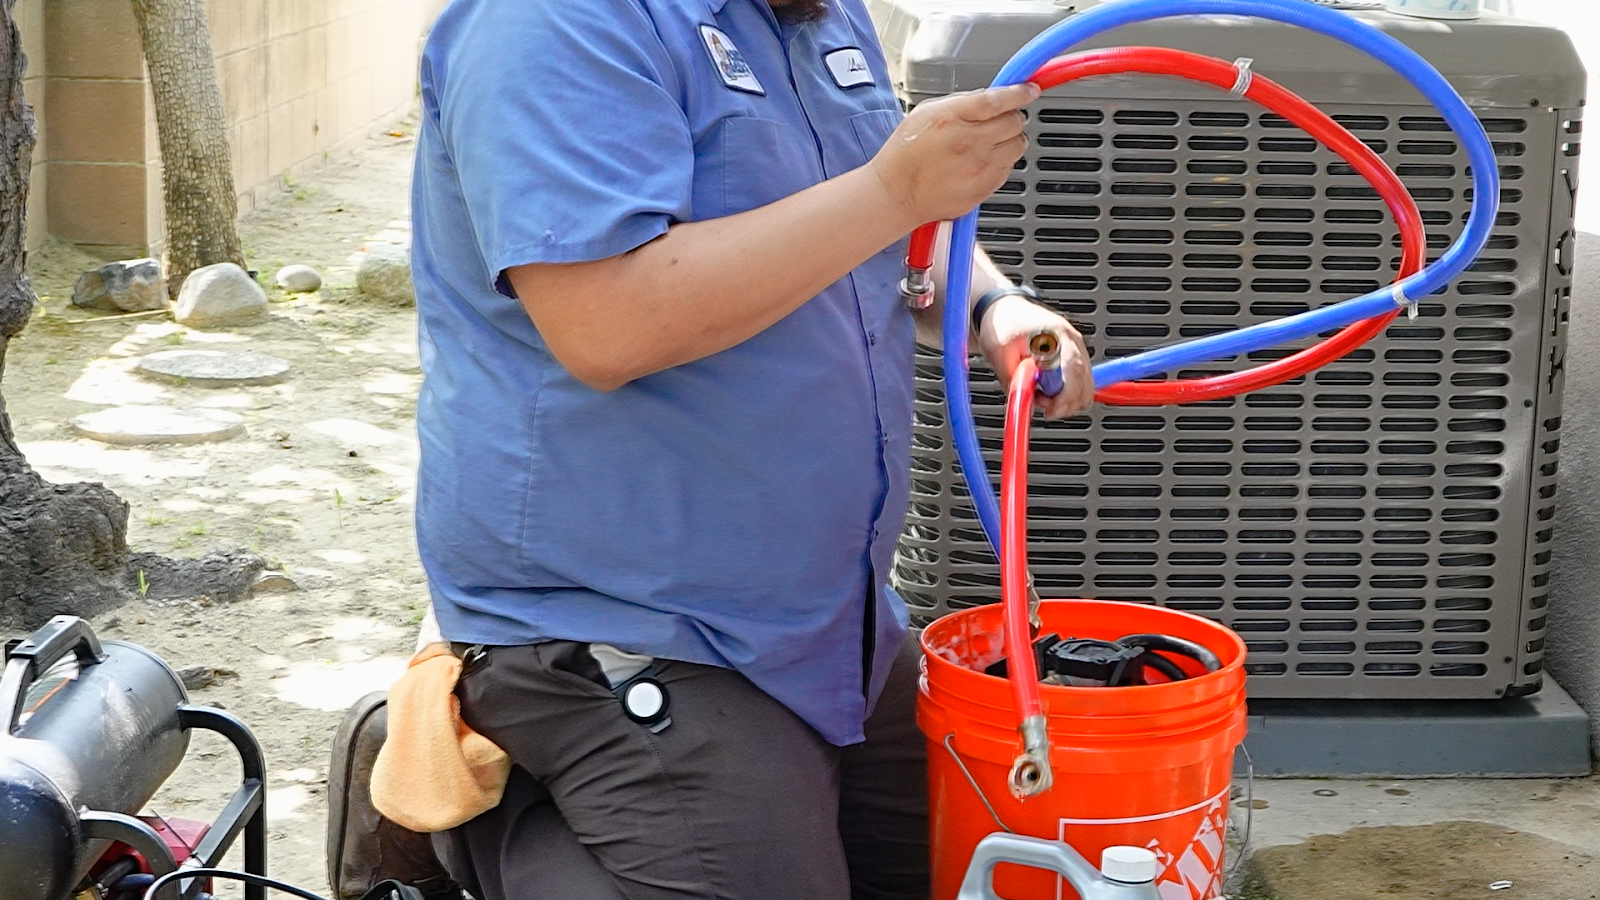
- Two water heater hoses: These two hoses can be found together in hardware stores. One is red for hot water, the other is blue for cold water, and both are flexible hose lines.
- 5-gallon bucket: To prevent leaks, a 5-gallon bucket is required. It also holds the vinegar solution and needs ample space to submerge a water pump inside.
- Submersible water pump: This important tool helps pump the vinegar solution into the tankless water heater. A low horsepower pump with one-fifth or one-sixth horsepower is recommended so the vinegar has the necessary pump power to flush out sediment.
These tools are all readily available at most hardware stores around Southern California. Some of these stores even sell flushing kits that include the cleaning solution, submersible water pump, hoses, and gloves.
A Monkey Wrench Plumbing, Heating & Air technician with the equipment for a tankless water heater flush.
After gathering your tools, you can start the tankless water heater flush process.
How to Flush a Tankless Water Heater Without Isolation Valves?
Before you get started, confirm if your tankless water heater has isolation valves. If it does, separate steps are available for flushing a tankless water heater with isolation valves.
If you proceed to flush without isolation valves, here are the four major steps.
- Turning off connections
- Adding vinegar
- Flushing the tankless water heater
- Finishing up
It’s important to note that some tankless water heater manufacturers, like Rheem, require isolation valve installations to flush their units properly. Before you begin, review your tankless water heater user manual for more information on flushing out your unit.
1. Turning off Any Connections
Tankless water heaters have connections to an electrical outlet, main water line, and gas line (doesn’t apply to electric-only tankless water heaters) that must be shut off before a flush. Here’s a breakdown of the steps for this phase of the tankless water heater flush.
- Unplug the tankless water heater: Out of the three, unplugging your tankless water heater is simple. Some tankless water heater units have specific directions for shutting them off, so refer to your tankless water heater user manual for more information.
- Turn off the gas valve: Once you locate the gas valve, you may need the channel lock pliers to shut it off. This will also shut gas access to other appliances in your home, like a kitchen stove.
- Turn off the water line: Normally, hot and cold water isolation valves can be shut off in this step. Since the tankless water heater has no isolation valves, you must shut off the main water line, which also shuts off water access to the entire home. Isolation valves isolate the tankless water heater from the rest of the main water line so water is cut off at the unit instead of the whole house.
- Disconnect hot and cold water line connections: Once you shut off the connections, you will need to disconnect the hot and cold connections attached to the tankless water heater. If these connecting lines are flexible connectors, loosen them up and disconnect them. If the connecting lines are pipe only, isolation valves are required, and you will need to contact a technician for further assistance.
After shutting off any connections, you can proceed to the next step.
2. Adding Vinegar to the Tankless Water Heater
After ensuring that connections are turned off, you can start the process of setting up the flushing solution.
- Connect the two hoses: You can connect the red hose to the hot water line of the tankless water heater and place the other end in the 5-gallon bucket. Connect the blue hose to the cold water connection of the tankless water heater and connect the opposite end to the submersible water pump.
- Set up the water pump: Place the submersible water pump in the bucket and keep the electrical inlet outside the bucket. Pour the white vinegar solution into the bucket until the pump is completely submerged.
- Start the water pump: Plug in the water pump and let it push the vinegar solution through the tankless water heater. Allow the pump to run and flush for an hour.
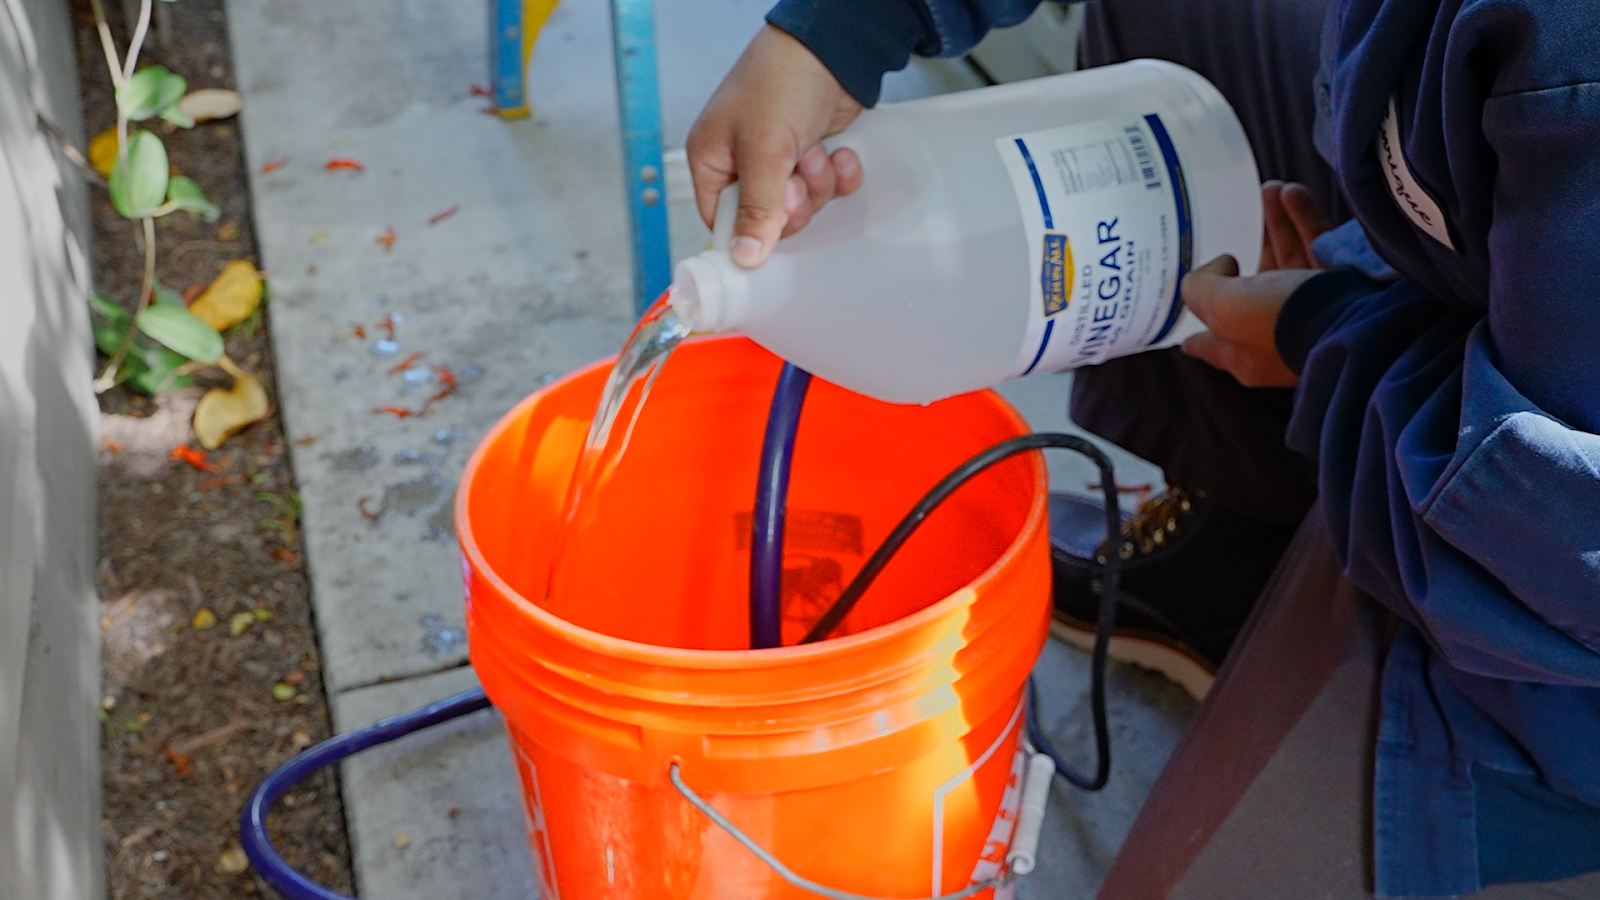
A Monkey Wrench Plumbing, Heating & Air technician adding vinegar to a 5-gallon bucket.
As the water pump does its thing, you will notice sediment coming out of the hose and dumped back into the bucket. After an hour passes, you can shut off the water pump and move to the next step.
3. Flushing Tankless Water Heater
Once you unplug the water pump after it pushes the vinegar into the tankless water heater, you can perform these next steps.
- Remove the blue hose: Loosen up and remove the blue hose from the submersible water pump and the cold water line of the tankless water heater.
- Remove and clean the inlet filter: This tiny sediment filter is located underneath the tankless water heater but may vary by model and brand. Refer to your tankless water heater manual for more information on its location. Once removed, rinse any sediment and put it back in.
- Reconnect the cold water line: Remove the blue hose and place it away. Connect the cold water line back to the tankless water heater. Keep the hot water hose inside the bucket.
- Turn on the water line: Turn on the main water line access to the tankless water heater. Let the water run through the tankless water heater to flush out any residue and remaining vinegar solution. The water will pour out of the red hose and into the bucket. You may have to dump out the water a few times.
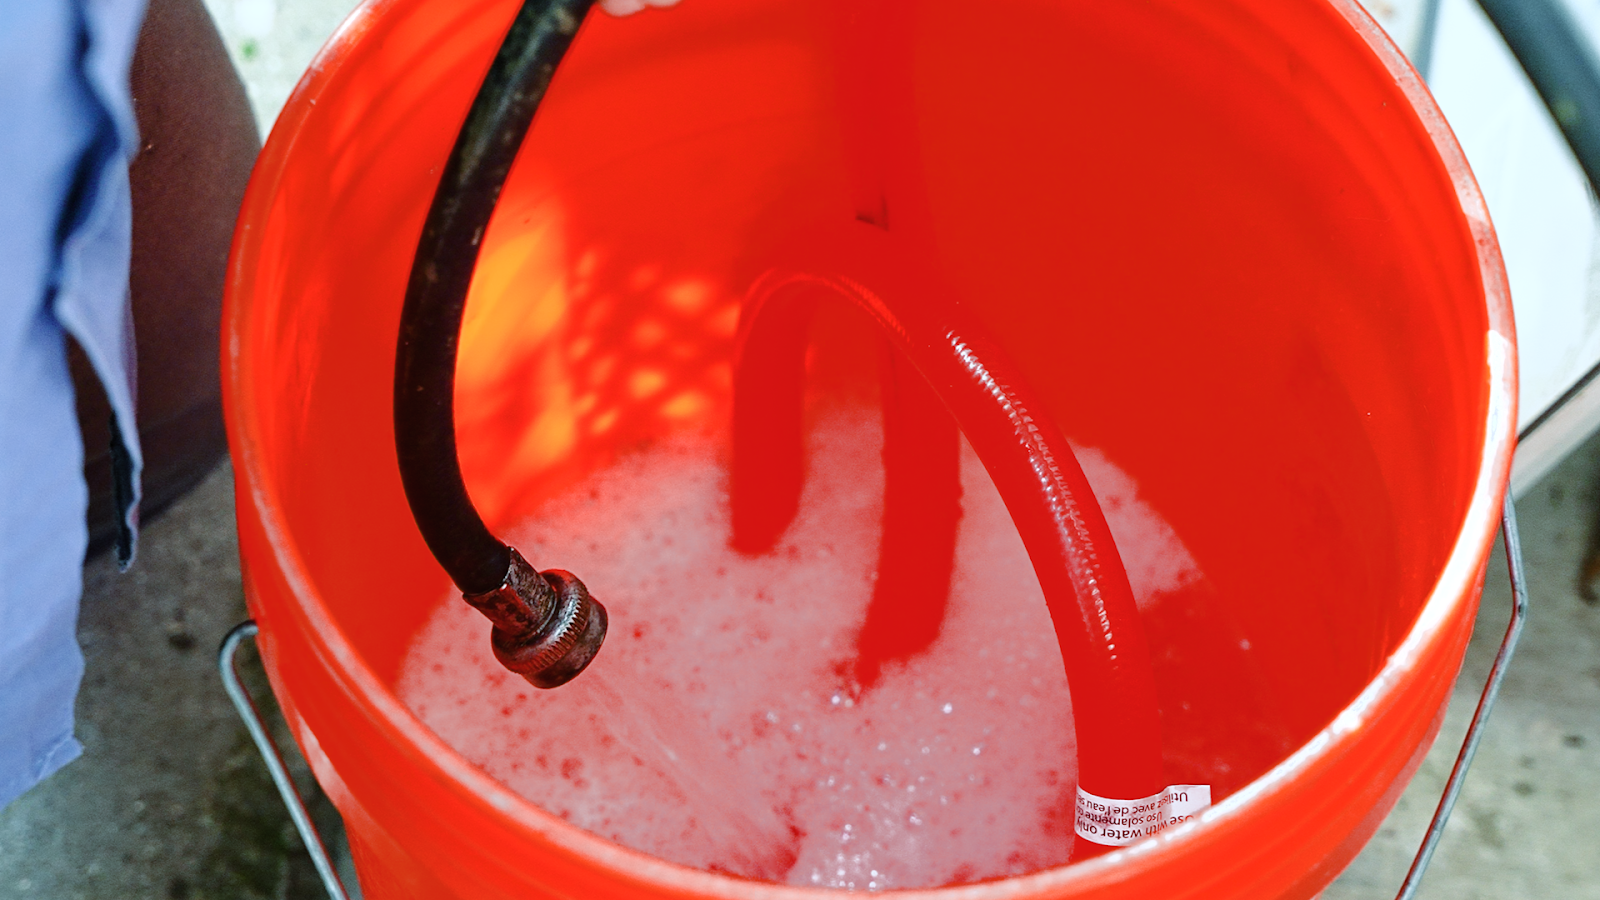
Water is drained into a 5-gallon bucket during a tankless water heater flush.
After flushing out the water, you are one step closer to finishing the entire tankless water heater flushing procedure.
4. Finishing Up the Tankless Water Heater Flush
The final steps of flushing a tankless water heater without isolation valves are simple and can be completed in the following steps.
- Turn off the water line and disconnect the red hose: Turn off the cold water line access to the tankless water heater and remove the red hose from the hot water line.
- Reconnect hot water line: Re-attach the hot water line to the tankless water heater and ensure it’s tightened with the channel lock plier.
- Turn on any remaining connections: Use the channel lock pliers to turn on the gas valve. Plug your tankless water heater back into the electrical outlet.
- Run a hot water test: Head inside your home and turn on a hot water fixture. Let the hot water run for five minutes to ensure any vinegar solution is flushed out of the tankless water heater.
As the hot water runs, gather all your tools and equipment and store them away.
Flushing a tankless water heater without isolation valves is more complex than flushing it with isolation valves. Although most tankless water heaters aren’t included with isolation valves, most technicians often include them in the installation.
If you want to make flushing your tankless water heater easier, then you can install isolation valves. On their own, isolation valves cost between $100 and $150 but can cost more if you require installation assistance.
Completing a Tankless Water Heater Flush Without Isolation Valves
Once you have finished running a hot water fixture, you have completed a tankless water heater flush without isolation valves. The entire process should take from one to two hours to complete. If you run into any issues throughout the process, contact a technician immediately.
Flushing out tankless water heaters is a huge part of what we do at Monkey Wrench Plumbing, Heating & Air. Since 2007, we assisted homeowners from Los Angeles and the surrounding counties with staying on top of their tankless water heater maintenance. Although we’ve flushed thousands of tankless water heaters, we understand that it may be the first time for some homeowners, so we input all of our knowledge into this article to empower homeowners to flush their tankless water heaters.
If you have any questions regarding a tankless water heater flush without isolation valves or a general inquiry about general maintenance, contact us using one of the buttons below. You can also book an appointment directly through our tankless repair online scheduler.
Tankless water heaters require other maintenance services besides a flush. Find out more about what this type of maintenance looks like to keep your tankless water heater in top condition.
If you prefer a technician solely to handle tankless water heater maintenance, learn more about the Monkey Wrench Plumbing, Heating & Air Home Protection Plan for annual checkups, inspections, and routine maintenance on your tankless water heater.